How to Take a Good Photo for a Fake ID?
If you’re looking to get a fake ID from our site, you’ll need to provide us with a photo, so we can do the rest. Taking a good photo is a crucial part of making the fake ID look convincing: no matter how convincing the actual card looks, if the picture isn’t up to state standards, then there’s not a single bouncer in the country that’s letting you into a bar.
If you don’t know how to take pictures that look like they were taken at a DMV, don’t worry—we’ll show you how to take one that puts government photos to shame.
Why Taking a Good Picture for Your Fake ID is Important
At Hotfakeid, we collect and deem your digital photo as the most important element when ordering a fake ID. Every state has specific legal requirements for government-issued photos, so if yours doesn’t match, your fake ID won’t be effective. The picture you include with your information will be used on the fake ID itself.

We do our part to make the card look indistinguishable from real IDs, so the quality of the actual photo itself is up to you. This is why we’re going to give you a comprehensive guide on how to take the perfect photo for your fake ID.
Why State ID Photos Look the Way They Do
Before you grab your camera and take a photo of yourself, it’s important that you understand how government-issued state ID photos differ from normal photos and why they look the way they do.
State ID photos are often taken in a way that doesn’t allow for flexibility in terms of pose, expression, or lighting. The lighting used in ID photo booths or at the DMV is usually unflattering, as they cast harsh shadows and emphasize imperfections. They are taken to visually identify individuals, so the focus is on capturing a clear and accurate representation of a person’s face and features, not creating a flattering image.
People are also told to stand up straight and keep a neutral expression when taking state ID photos. This makes people feel tense, which can lead to rigid facial expressions and an overall unappealing appearance.
So, if you want to recreate state ID photos in your own home, you need to recreate the same circumstance you would have at the DMV—harsh lighting, and a tense pose and expression. A tense pose and expression are easy to do, so let’s go ahead and look at how you can set up your camera to take state-ID-worthy pictures.
Setting Up Your Camera
The specific type of camera used in licensing agencies varies depending on the location and the type of ID being issued. With that said, most agencies use digital cameras that are designed specifically for ID photo capture. These cameras typically have a high-resolution sensor and are capable of capturing images with consistent lighting and color accuracy.

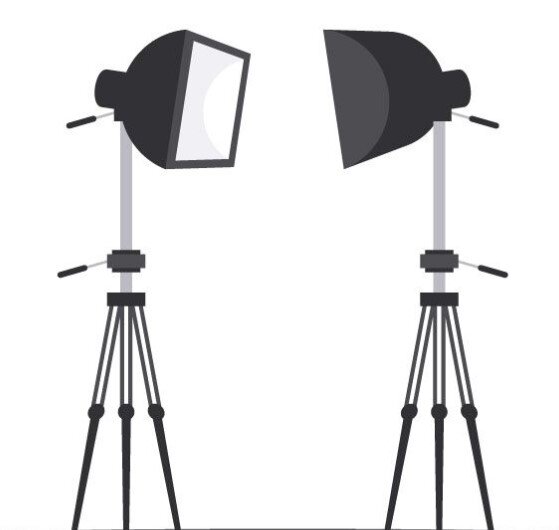
To recreate the harsh lighting environment of a government office, you’ll need to illuminate your face with bright lights, both above and in front of you. There are also a few camera settings you can change to help your phone capture images like the cameras used in government offices.
How to Take an ID Photo Using Android
Increasing the contrast on your phone’s settings can help you take a good picture for your fake ID. Here’s how to do it:
- Open the camera app on your phone.
- Find the icon that looks like three horizontal lines or dots or a gear icon, which will usually be located somewhere on the screen. This will open the camera app’s settings.
- Look for an option that says ‘Contrast’ or ‘Exposure’ and tap it.
- Depending on your camera app, you may be presented with a slider or a set of buttons that allow you to adjust the contrast. Move the slider or tap on the buttons to increase the contrast as desired.
- Once you’ve made your adjustments, exit the camera app’s settings menu and take your photo.
If your camera app doesn’t have a contrast or exposure setting, you may be able to use a third-party camera app that offers more customizable features. You can also use a photo editing app to adjust the contrast of your photos after they have been taken. There are numerous applications available on Android which are free to use and comply with government instructions. We suggest ID Photo Application by siranet on playstore.
How to Take an ID Photo with an iPhone

To increase the contrast on an iPhone, adjust the exposure and brightness by following these steps:
- Open the camera app on your iPhone.
- Tap on the screen to focus on your face. Since you’re taking a picture of yourself, you’ll want a friend to help you with this. A yellow box will appear to indicate where the camera is focusing.
- Once the camera has focused on the subject, swipe up or down on the screen to adjust the exposure level. Swiping up will increase the exposure, making the image brighter and decreasing contrast, while swiping down will decrease the exposure, making the image darker and increasing contrast.
You can also use the HDR (High Dynamic Range) feature in the camera app to capture images with a wider range of contrast. To turn on HDR:
- Go to your iPhone’s general settings.
- Select ‘Camera’.
- Toggle off the ‘Smart HDR’ option, so that the HDR setting appears on the camera app.
- Tap on ‘HDR’ on the top left corner of the screen. The camera will take multiple shots at different exposure levels and combine them to create a final image with improved contrast.
Once you’ve made your adjustments, tap on the shutter button to take your photo. If the photo doesn’t look convincing enough, you can use a photo editing app to further adjust the contrast after the photo has been taken.
State ID and Driver’s License Photos: Legal Requirements
To help you better understand what a proper State ID or driver’s license photo is supposed to look like, let’s talk about what the photos are legally required to look like or contain.
These requirements may vary depending on the state, jurisdiction, and the type of ID being issued, but they generally aim to ensure that the ID photo accurately represents the person and can be used for identification purposes. Here are some of the general requirements:
1. Size
The photo must be a specific size, typically 2 inches by 2 inches or 1.5 inches by 1.5 inches, depending on the state.
2. Background
The background of the photo must be a solid, light-colored background without any patterns or designs. This is intended to provide a contrast that makes it easier to identify the person’s face.

3. Lighting
The lighting must be even and free of any shadows that obscures the person’s face.
4. Expression
The person in the photo must have a neutral expression with their eyes open and looking directly at the camera.

5. Head Position

The person’s head must be straight and facing directly forward with both ears visible. Because everyone has distinct ear shapes, they are one of the most defining features a person can have, so they must be visible in photos.
6. Clothing
The person in the photo must not be wearing anything that could obscure their face, such as a hat or sunglasses.

7. Photo Quality

The photo must be clear and free of any distortions or blurring that could make the person difficult to recognize.
State ID vs. Driver’s License Photo Requirements
The id review samples page shows the ideal photos taken by some of our customers. Depending on the kind of fake ID you’re ordering (driver’s license or state ID), you may need to consider taking your picture a certain way. The differences between ID photos for state IDs and driver’s licenses can vary depending on the jurisdiction, but there is one difference you should consider, especially if you wear glasses.
Some jurisdictions may require that driver’s license photos show the individual wearing glasses if they normally wear glasses while driving, while this may not be a requirement for state ID photos.

This is because state IDs and driver’s licenses serve different purposes. State IDs are used to identify individuals while driver’s licenses are used as both proof of identity and to demonstrate that the individual is authorized to drive a car.
A driver’s license can also be used to demonstrate whether or not the person needs glasses to drive the car safely. This is why some jurisdictions require that you wear glasses in your driver’s license photo if you need glasses to drive. In the past, this was unheard of, as glasses obstruct the face, making it hard to recognize the person in the photo accurately.
However, face recognition technology has gotten to the point where it can accurately recognize people with glasses on if there are no reflections, so different licensing agencies are allowing them in driver’s license photos. Wearing glasses if you need them to drive is not a state-dependent requirement.
The requirements for wearing glasses in driver’s license photos may also change over time, and they can vary by state and jurisdiction. So, you need to look up the requirements for driver’s license photos in the jurisdiction you want to get the fake ID from.
Dos and Don’ts of Taking a Photo for a Fake ID

Do:
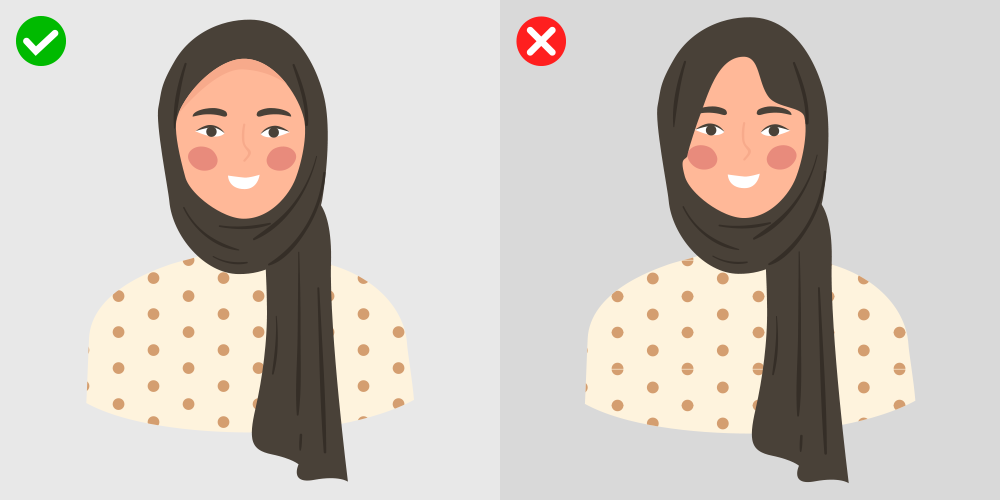
- Keep your ears visible. If you have long hair, tuck your hair behind your ears or put your hair in a ponytail.
- Look up your jurisdiction’s requirements about glasses in driver’s license photos. If you do need to take a photo with glasses on, make sure there is no glare, no reflections, and the frames of your glasses don’t obstruct your face.
- Take the photo with a white or off-white background.
- Use plenty of lighting.
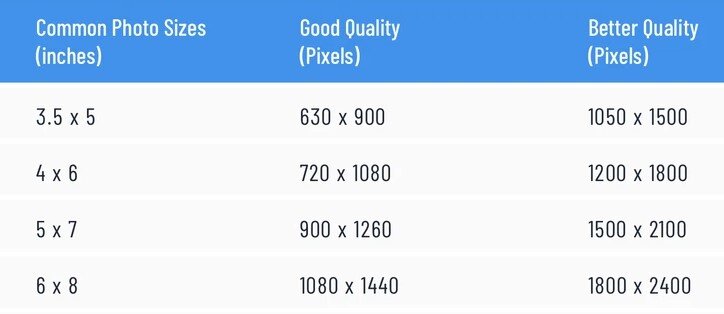
- Make sure the photo quality is good in case it needs to be resized.
- Make sure that, when scaled down to a 2×2-inch format (standard ID size in most states), your head is no longer than an inch long from your chin to the top of your head.
Don’t:

- Don’t select the black and white filter yourself. If the state you want your fake ID to be from has requires a black and white photo, leave that to us. Different states use different black and white gradients that only we’ll be able to replicate successfully.
- Don’t photoshop the photos to make yourself look older.
- Don’t angle your head. Look straight into the camera, tuck your chin a little, and make sure the shot is head-on.
State-Specific Requirements:
State ID photos can vary from state to state in terms of the specific requirements for the photo, such as size, background color, and lighting, though many of them result in the same kind of photo.
Each state’s DMV or licensing agency has its own guidelines and regulations for state ID photos, which are designed to ensure the photos are clear, accurate, and usable for identification purposes. For example, some states print the photo in black and white on the actual ID or driver’s license, while other states use color photos.
The decision to use a black and white or color photo on an ID is typically determined by each state’s DMV. The reason why some states use black and white photos on their IDs while others use color photos can vary.
One factor that can influence the decision to use black and white photos is cost. Black and white photos may be less expensive to produce than color photos, and some states may choose to use them in order to save money.
Another factor that can influence the decision to use black and white photos is security. Some states believe that black and white photos are less likely to be altered or counterfeited than color photos and therefore choose to use them in order to enhance the security of the IDs.
Ultimately, the decision to use black and white or color photos on an ID is up to each individual state’s DMV or licensing agency. While some states may choose to use black and white photos for cost or security reasons, others may choose to use color photos in order to provide a more accurate representation of the individual’s appearance.
The states that use black and white photos for state IDs or driver’s licenses are:
- Alaska
- Colorado
- Georgia
- Indiana
- Kentucky
- Maryland
- New York
- Ohio
- Vermont
- Virginia
- Wisconsin
It’s always a good idea to check with the DMV or licensing agency’s photo requirements before taking the picture. Remember, you can buy a fake state ID or driver’s license from outside your actual state, so if you’re going to do that, check the requirements for that state.